Introduction: The Overlooked Variable — Angle of Incidence
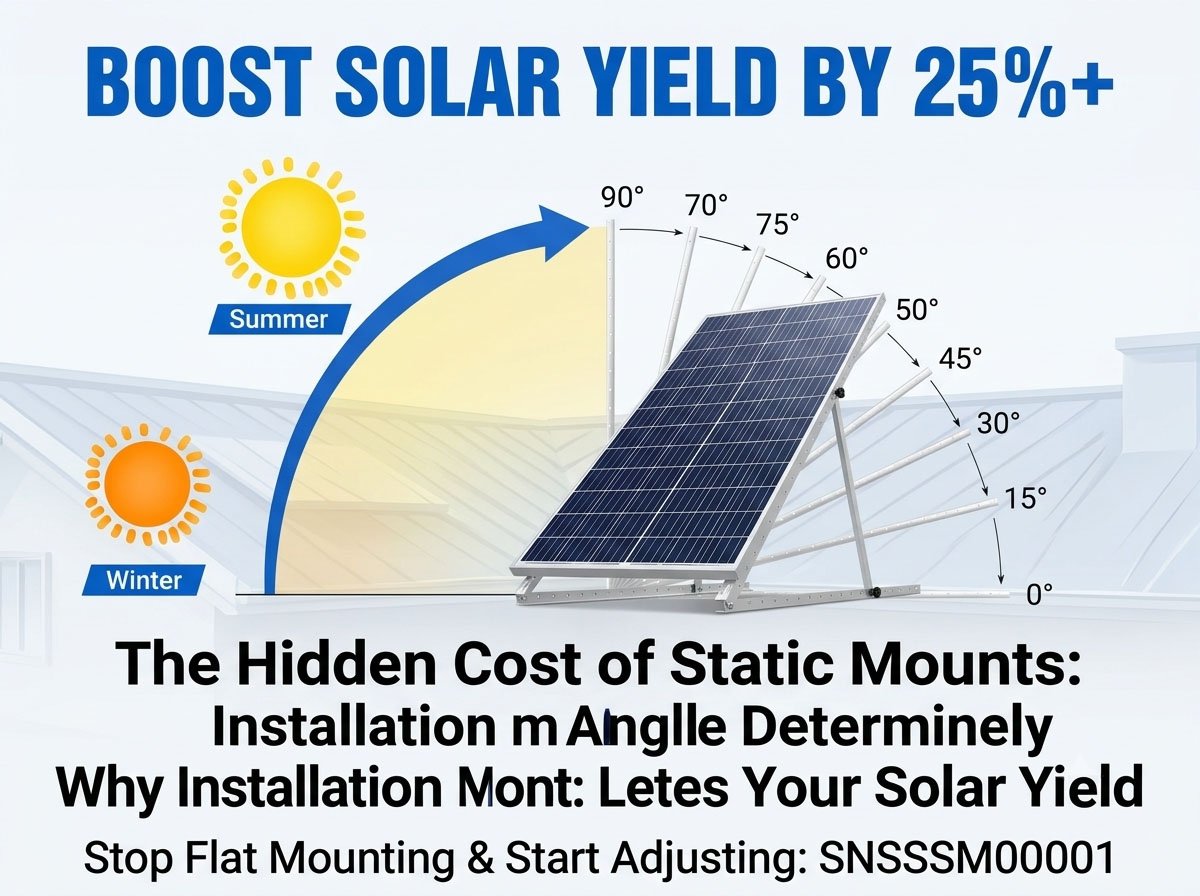
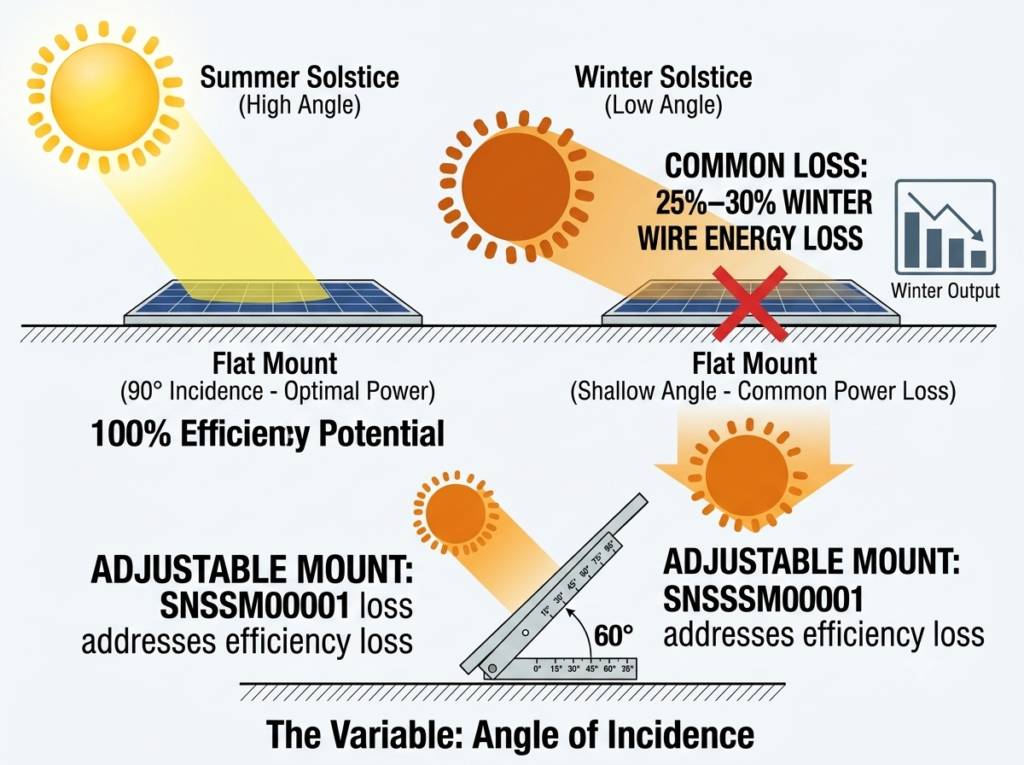
Most solar procurement decisions are driven by panel wattage and battery capacity, while a variable with direct impact on system output is routinely ignored: angle of incidence. When a panel is mounted flat against a roof or ground surface, energy capture losses of 25–30% are common during low-sun-angle winter months. This is not a design flaw in the panel — it is a structural limitation of the mount itself. SNSSSM00001 is engineered to address this specific efficiency loss.
1. The Physics of Seasonal Angle Adjustment
Peak irradiance capture occurs when sunlight strikes the panel surface at 90°. Solar elevation angle shifts by season, and a fixed-angle mount cannot track this shift:
| Season | Solar Elevation | Recommended Tilt |
|---|---|---|
| Summer | High | ~15°–20° |
| Winter | Low | ~45°–60° |
SNSSSM00001 provides continuous 0°–90° adjustment, with stamped angle scale markers at 7 fixed positions (0° / 15° / 30° / 45° / 60° / 75° / 90°). Installers can set the correct tilt without a protractor or inclinometer. Two seasonal recalibrations per year are sufficient to keep the array within its optimal tilt range year-round.
2. Structural Material Specifications
Mount service life must match the panel’s rated 25-year lifespan. This is a quantifiable material requirement, not a marketing claim.
Main Structure
- Material: Anodized aluminum alloy, 100% anodized surface coverage
- Wall thickness: 3mm (caliper-verified)
- Wind load rating: 60 (m/s class)
- Snow load rating: 1.5 (kPa class)
- Surface treatment: Anodized — rated for prolonged exposure to salt-laden coastal air and high-humidity environments
Fastener System
- Material: SUS304 stainless steel
- Rationale: Carbon steel or lower-grade stainless fasteners corrode under outdoor exposure, and corroded bolts lose clamping force — a leading cause of mount structural failure. All load-bearing bolts on SNSSSM00001 use SUS304 to maintain structural integrity across the full service life of the panel.
Base Specifications
| Attribute | Value |
|---|---|
| Model | SNSSSM00001 |
| Place of Origin | Jiangsu, China |
| Material | Anodized Aluminum + SUS304 Stainless Steel |
| Type | Triangle Solar Mounting Bracket |
| Wind Load | 60 |
| Snow Load | 1.5 |
| Max Load Bearing | <120KG |
| Packing | Independent thickened packaging |
| Unit Size | 115×10×5 (cm) |
| MOQ | 1 pc (bulk pricing available) |
| Logo | OEM supported |
3. Panel Compatibility and Installation Configurations
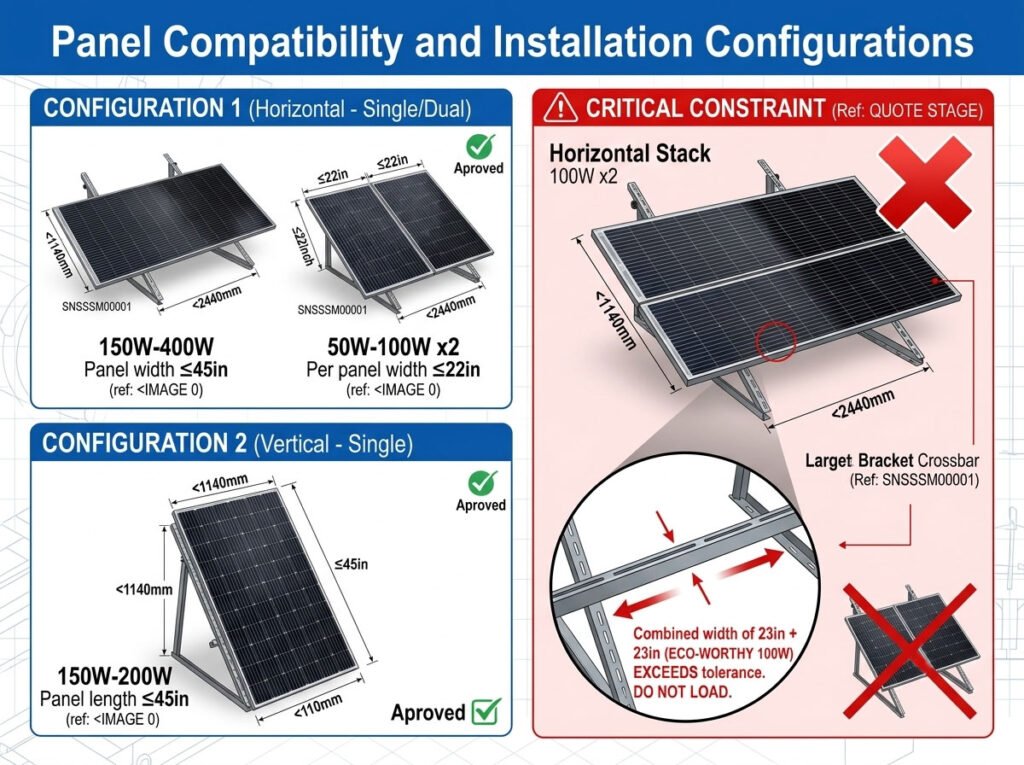
The bracket supports three panel layouts. Selection should be based on actual panel dimensions, not wattage alone:
| Configuration | Wattage Range | Qty | Dimension Limit |
|---|---|---|---|
| Horizontal (dual) | 50W–100W | 2 pcs | Panel width ≤22 in each |
| Horizontal (single) | 150W–400W | 1 pc | Panel width ≤45 in |
| Vertical (single) | 150W–200W | 1 pc | Panel length ≤45 in |
| Horizontal stack | 100W | 2 pcs | Per panel width limit |
Constraint to communicate at the quoting stage: the 45-inch bracket variant does not support two stacked 23-inch (100W) panels — the load points exceed the design tolerance of the horizontal crossbar at that combined width. Confirm panel length and width (reference: panel length <2440mm, panel width <1140mm) before order confirmation to avoid field rework.
4. Installation Sequence (Single-Operator, Three Steps)
The structure is designed around a fixed sequence — secure panel first, set angle second, anchor base last — to prevent unsafe angle adjustment under load.
Step 1: Panel Mounting Secure the panel to the bracket rail using 8 installation screws. The slotted rail accommodates varying panel hole spacing.
Step 2: Angle Adjustment and Locking Set the target tilt angle and lock the hinge with 4 screws. The stamped angle scale provides a direct visual reference during adjustment.
Step 3: Base Anchoring Secure the base to the mounting surface (roof, ground, or RV roof) using 6 self-tapping screws.
The full sequence requires no specialty tooling — a standard socket wrench completes all fastening operations.
5. When an Adjustable Mount Outperforms a Fixed Mount
From a cost-per-watt perspective: compensating for fixed-angle winter losses by adding an extra 100W panel typically costs more in procurement and freight than the price difference of upgrading to an adjustable mount — without the added footprint. For RV, marine, and off-grid installations where mounting area is constrained, optimizing yield per unit area is more cost-effective than adding panel count.
6. B2B Procurement Information
SNSSSM00001 is available to distributors, system integrators, and OEM buyers under the following terms:
- MOQ: 1 pc, with tiered volume pricing
- Customization: OEM logo, custom packaging, non-standard dimension adjustments available
- Packaging: Independent thickened packaging, suitable for combined ocean/land freight
- Technical support: Wind/snow load calculation documentation, CAD drawings, and installation manuals available for project bid submissions
For full technical datasheets, third-party test reports, or volume quotes, contact the SinoBolt engineering team. Tilt and load recommendations can be provided based on the wind/snow load code applicable to your project’s installation region.