Introduction: Why Static Solar Mounts are Costing You Money
Many solar enthusiasts focus entirely on panel wattage or battery capacity, often overlooking the most critical factor: The Angle of Incidence. If your solar panels are mounted flat on a roof or ground, you are likely losing up to 25-30% of potential energy harvest, especially during the winter months when the sun sits lower on the horizon. At SinoBolt, we’ve combined our expertise in metal structural integrity with solar engineering to solve this.
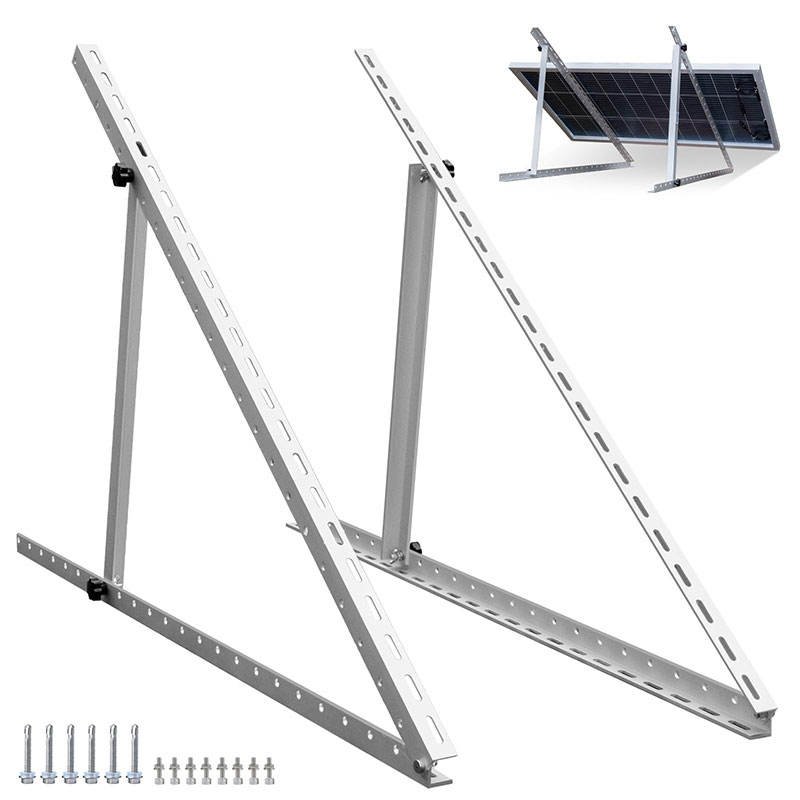
1. The Science of the “Golden Angle”
To achieve maximum power output, solar rays must hit the panel surface at a 90° angle. However, the sun’s position changes not only throughout the day but also between seasons.
Summer: The sun is high; a shallower angle (approx. 15-20°) is ideal.
Winter: The sun is low; a steeper angle (approx. 45-60°) is required to capture weak sunlight.
By using an adjustable 0-90° triangle bracket, you can “track” these seasonal shifts with two simple adjustments per year, ensuring your system operates at peak performance year-round.
2. Material Matters: Why We Use AL6005-T5 and SUS304
As professionals active in the metal futures and global supply chain, we understand that “aluminum” isn’t just aluminum.
For the SinoBolt Adjustable Bracket, we selected AL6005-T5 Anodized Aluminum. Here’s why it matters for your ROI:
Corrosion Resistance: The 3mm anodized layer prevents oxidation in salty coastal air or humid environments.
Strength-to-Weight Ratio: It’s light enough for RV roofs but strong enough to withstand wind speeds of 60m/s.
Fastener Integrity: We exclusively use SUS304 Stainless Steel bolts. Why? Because a rusted bolt is a structural failure waiting to happen. Our hardware ensures your panels stay secure for the full 25-year lifespan of the solar cells.
3. Step-by-Step Installation & Calibration
Installing the SinoBolt Triangle Mount is designed to be a one-person job.
Alignment: Position the base rails on your mounting surface (RV roof, flat roof, or ground).
Panel Integration: Bolt your panel (50W to 400W) to the tilting arms. Our bracket supports panels up to 45 inches in width or length.
The Scale Adjustment: Use the built-in degree scale on the bracket. Look up your local latitude; a good rule of thumb is:
Summer Tilt = Your Latitude – 15°
Winter Tilt = Your Latitude + 15°
Locking: Tighten the adjustment knobs to secure the triangle structure against wind vibration.
4. Is It Worth the Upgrade?
Let’s look at the numbers. Adding one extra 100W solar panel to compensate for efficiency loss costs significantly more (and takes up more space) than upgrading to an adjustable mounting system.
For off-grid users, RV travelers, and marine enthusiasts, space is a premium. Investing in a high-quality, adjustable tilt mount is the most cost-effective way to “expand” your solar capacity without adding more panels.
Conclusion
Solar energy is an investment in independence. Don’t let poor mounting angles hold your system back. With SinoBolt’s precision-engineered aluminum brackets, you’re not just buying a stand; you’re buying guaranteed efficiency.